Export to Excel

Quickly export your table's data to Excel by following these clear, step-by-step instructions. You'll end up with a fully formatted Excel file, organized just like the data you see in your Tables tab.
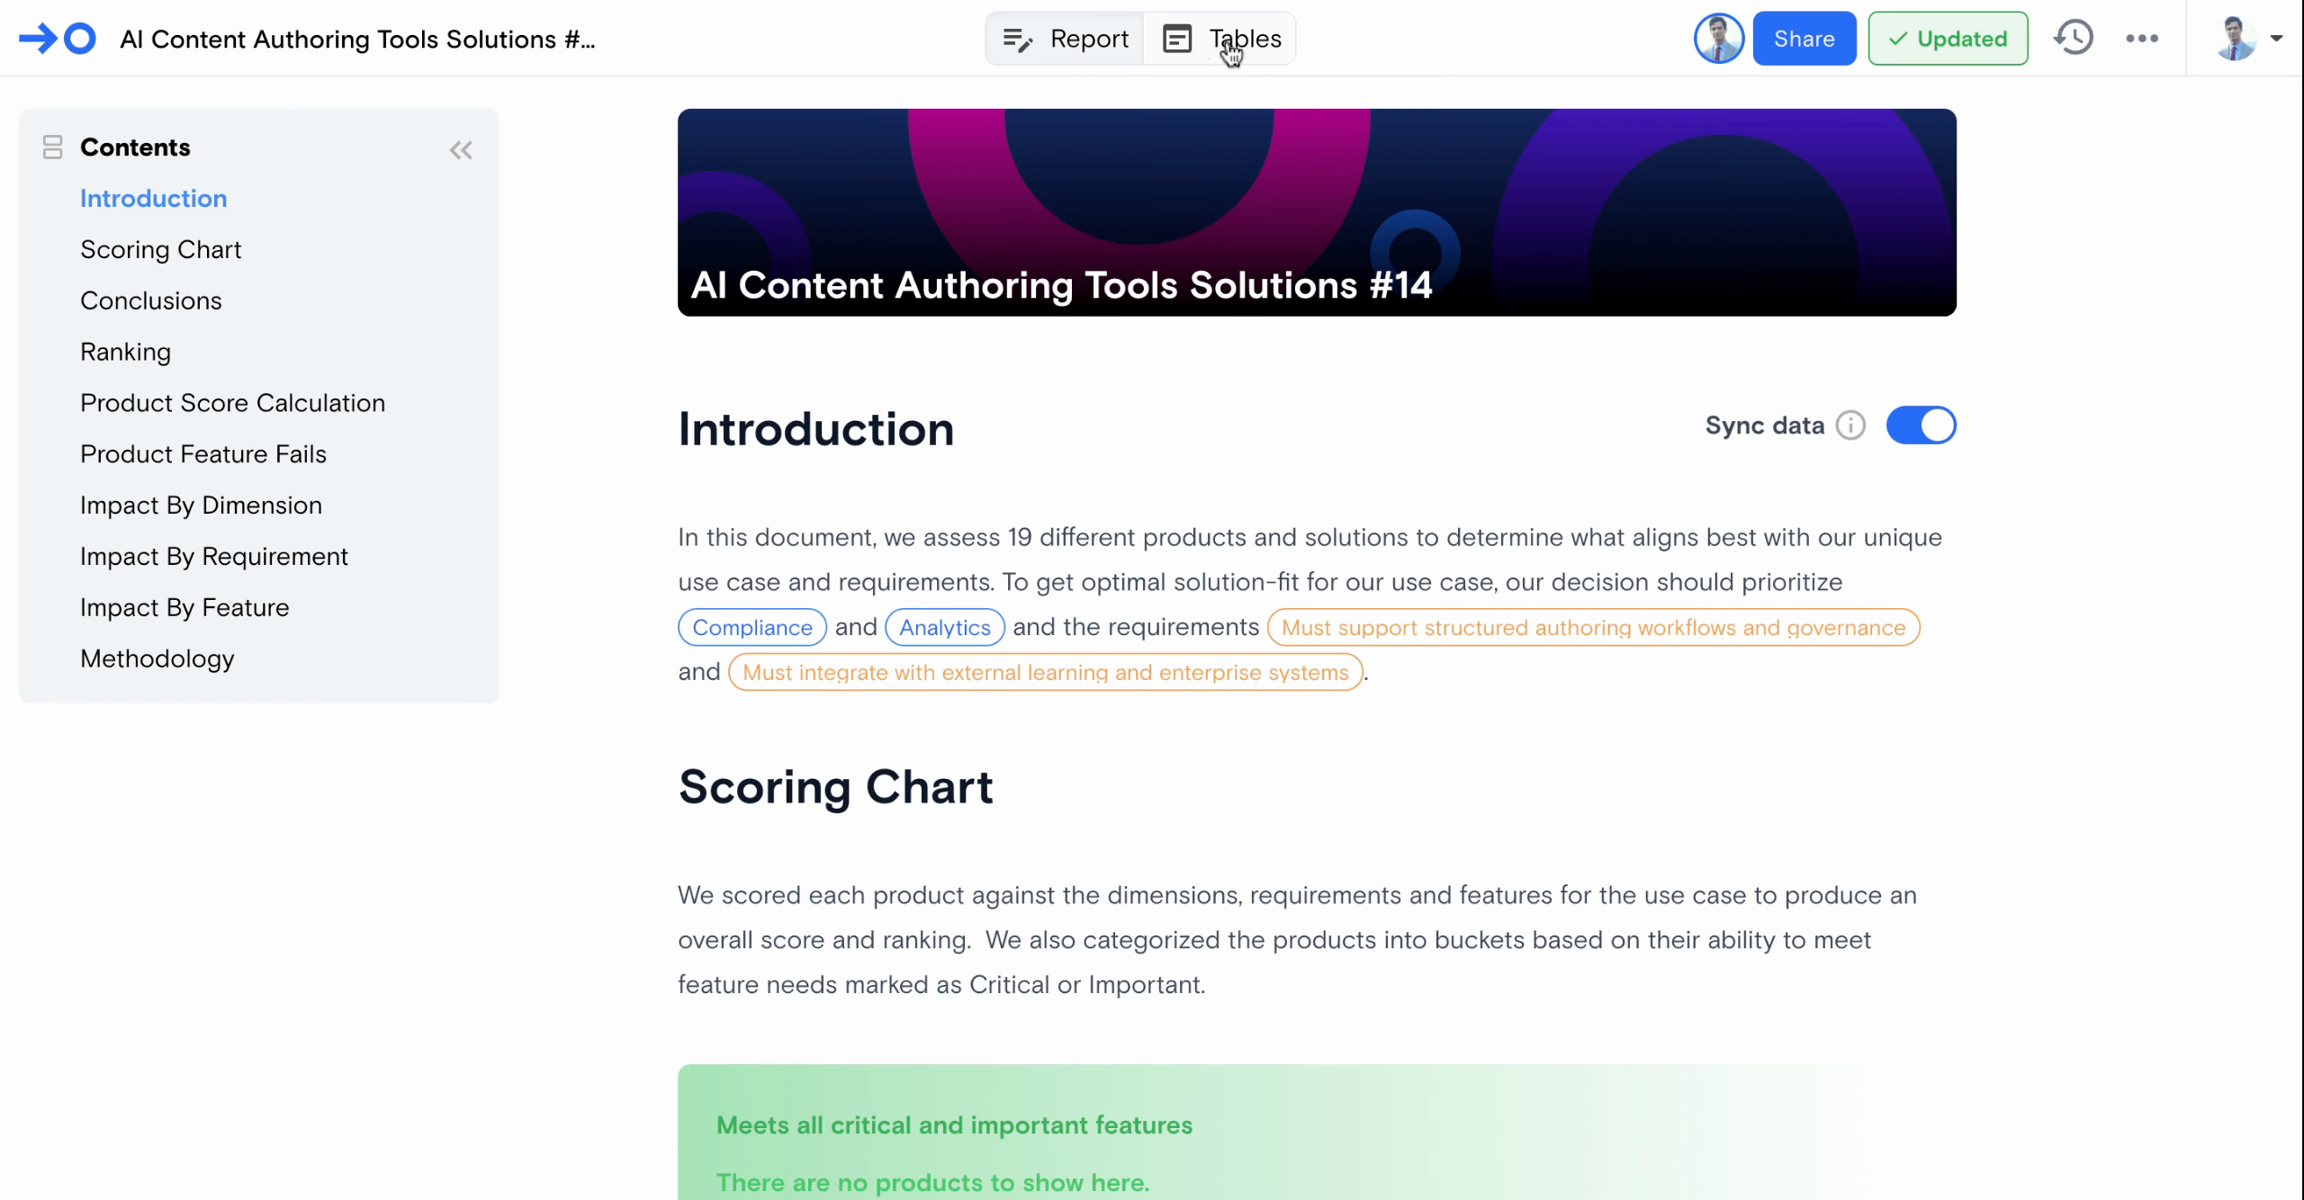
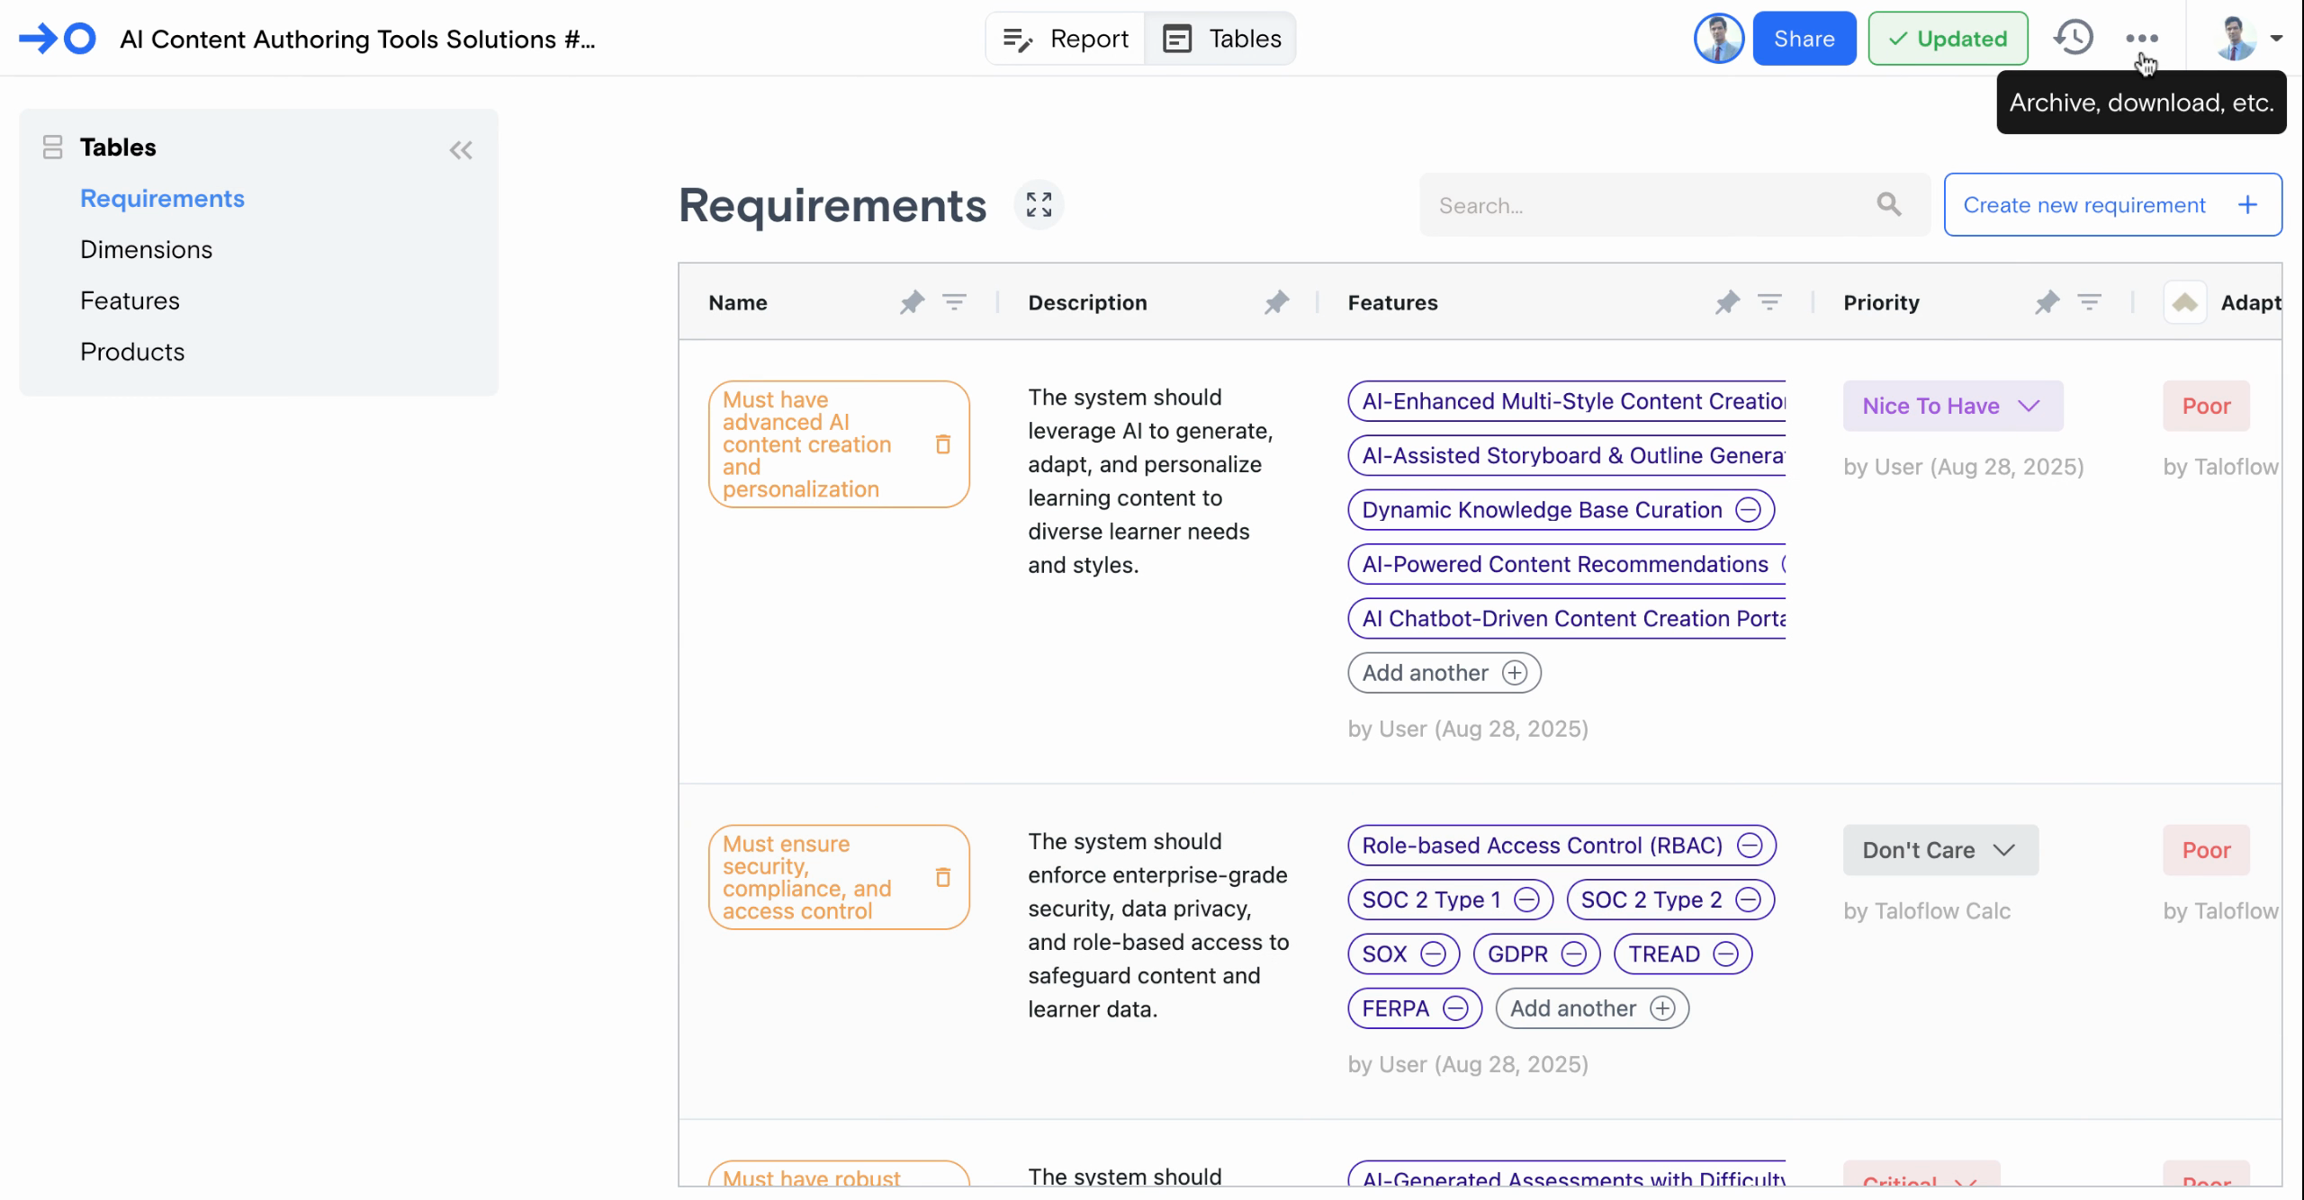
Step 1: Go to the Tables tab to view your existing tables.

Image

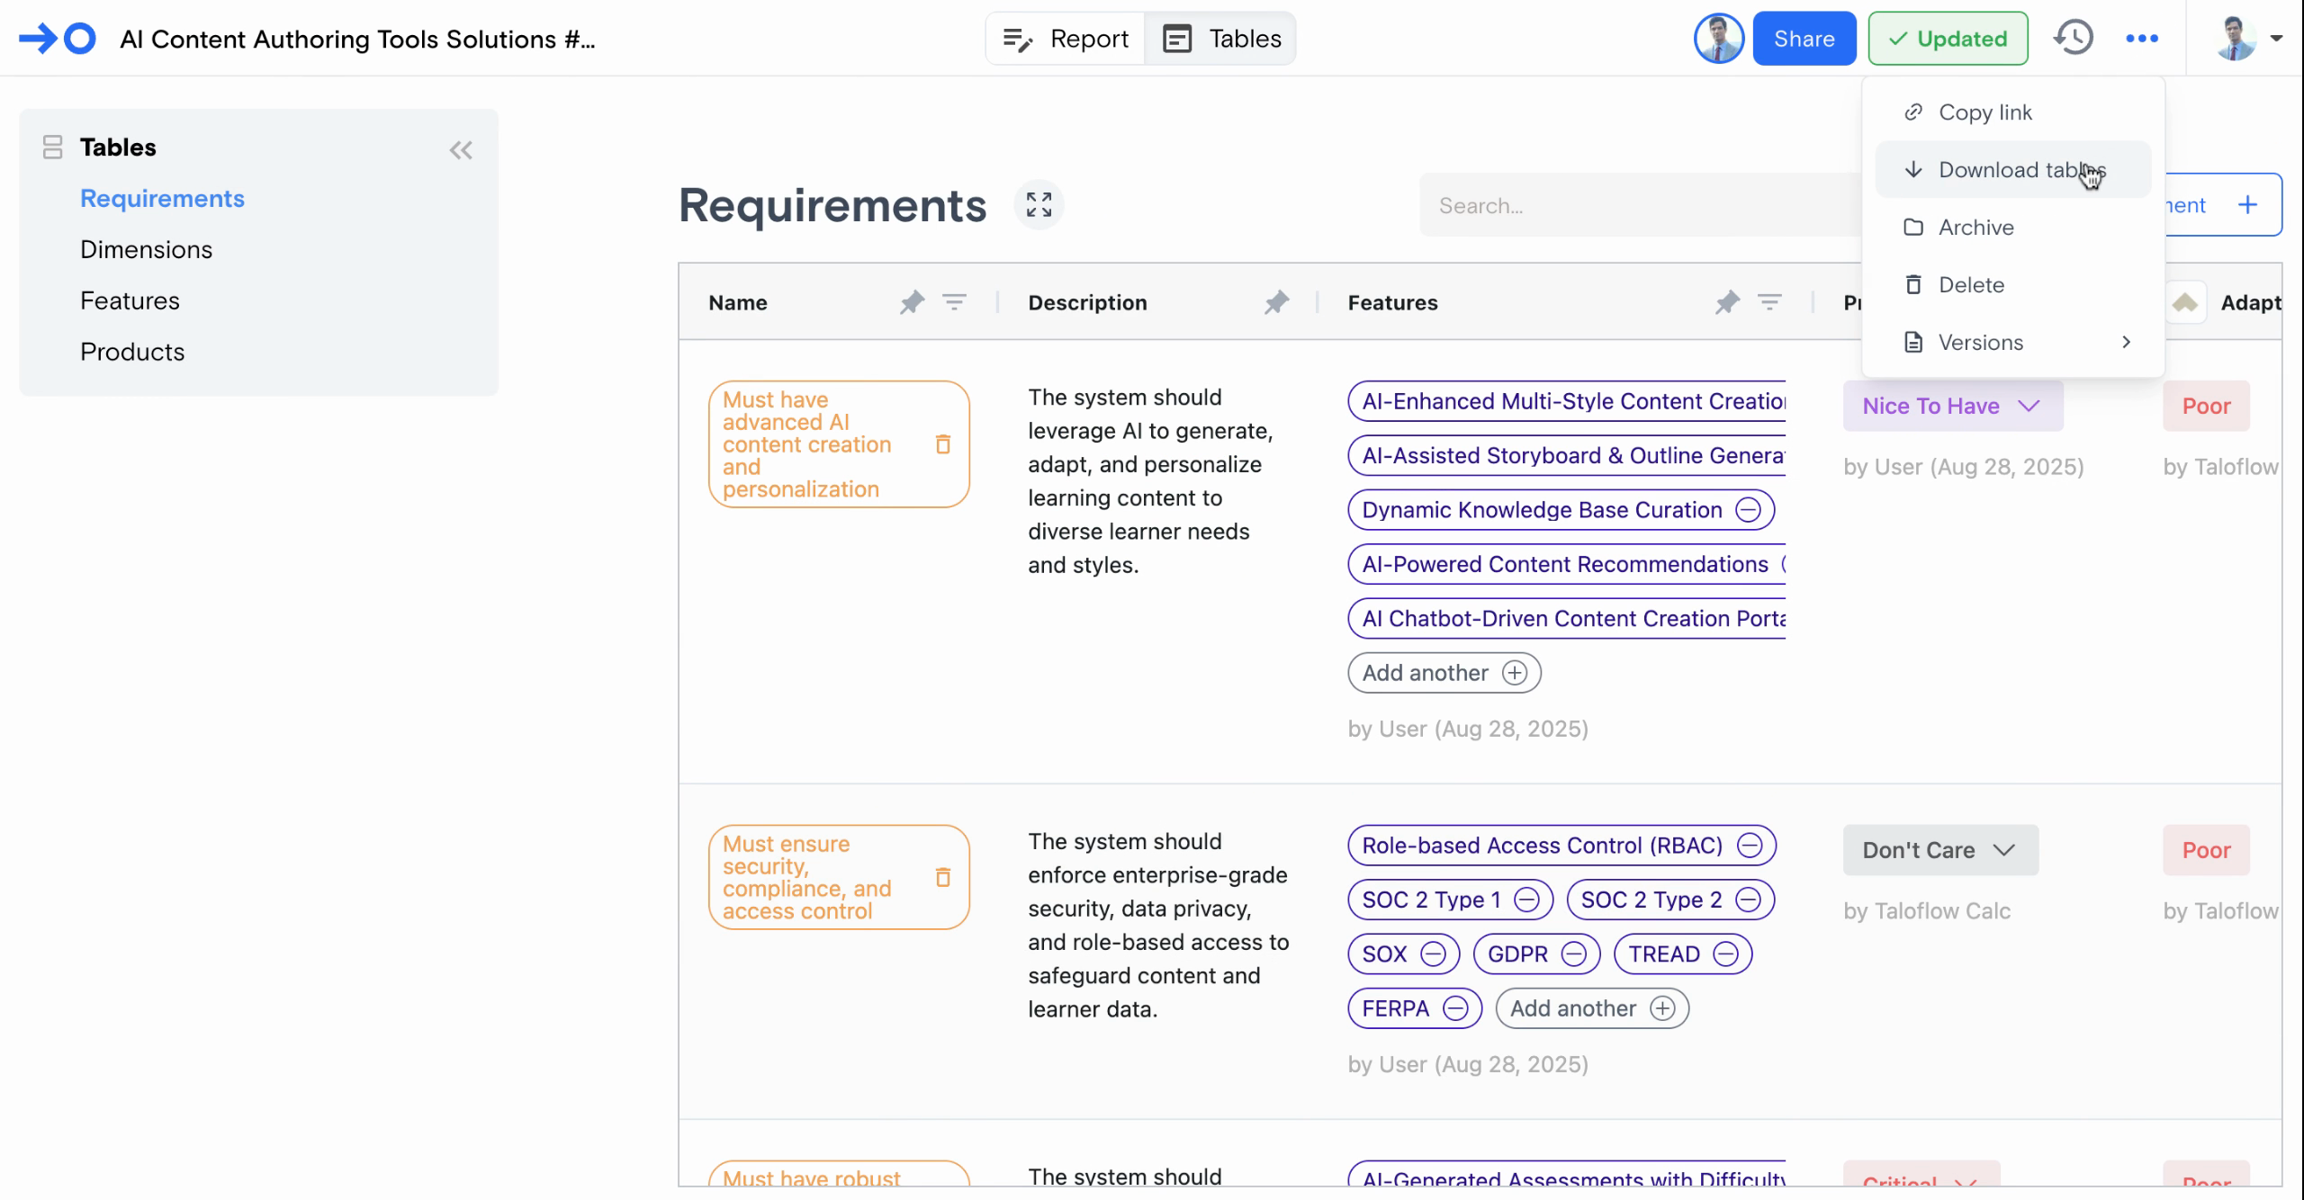
Step 2: Click the three dots menu in the upper right corner of the interface to reveal more options.

Image

Step 3: Select Download Tables from the dropdown menu to start the export process.

Image

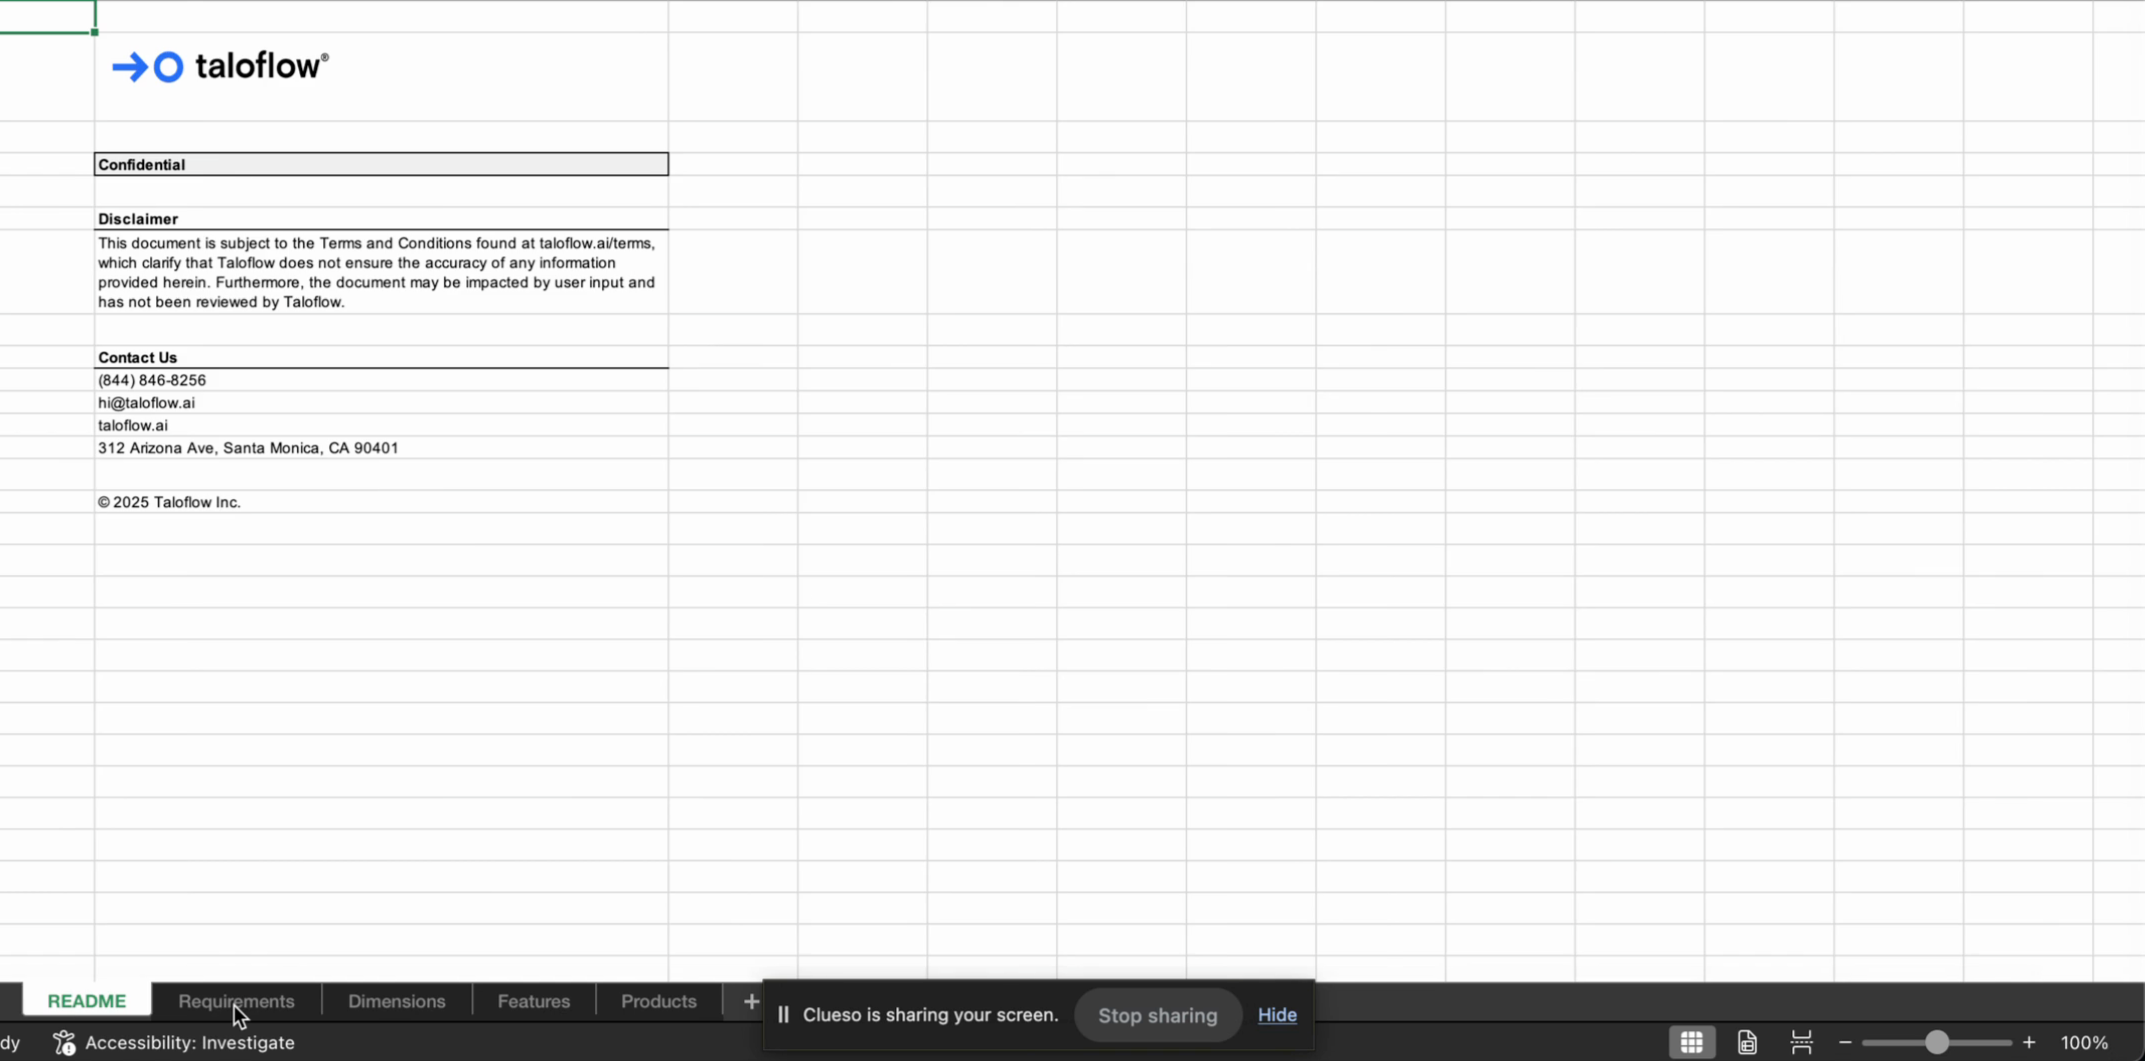
Step 4: Open the downloaded Excel file. The spreadsheet contains multiple tabs: Requirements, Dimensions, Features, and Products—matching the categories present in your evaluation.

Image

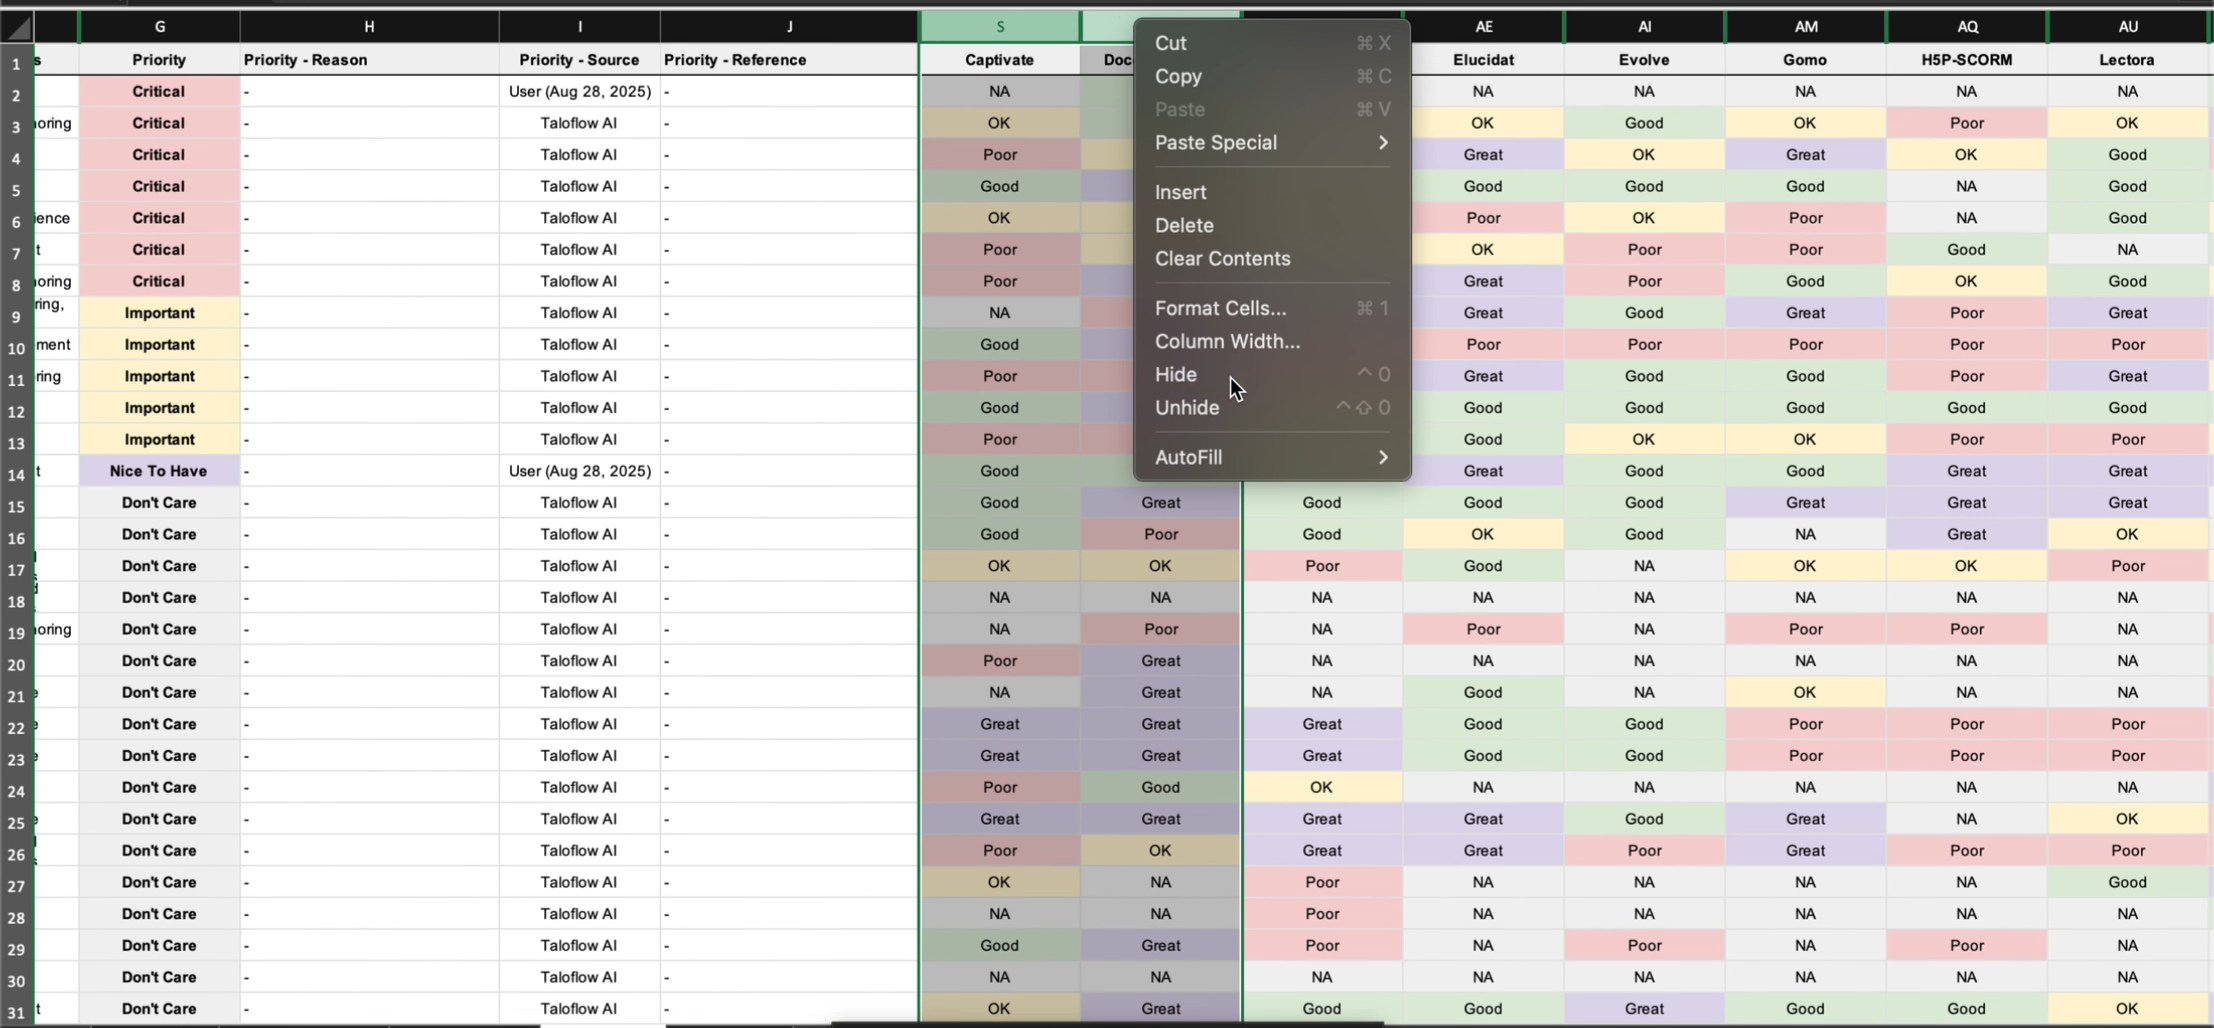
Some columns, such as Reasons, Sources, and References in the Features tab, may be hidden due to the detailed data displayed. To see these hidden columns, simply unhide them within Excel.

Image

By completing these steps, you're ready to work with all your exported data directly in Excel, organized just as it appears in the product interface.

Last updated

Was this helpful?